How to Send Automated WhatsApp Message on WP form Submission
  • May 07, 2025
  • exldigital by exldigital

Automate WhatsApp Messages from WP Forms Using exldigital

In today’s digital world, effective communication is key to building strong customer relationships. Automating responses not only saves valuable time but also ensures your customers feel promptly attended to.

If your website uses WP Forms for inquiries, feedback, or registrations, you can significantly improve customer experience by integrating automated WhatsApp messaging through exldigital. This setup allows you to send automatic thank-you notes, confirmation messages, or follow-up details immediately after a form submission.

In this blog, we’ll walk you through how to connect WP Forms to WhatsApp using exldigital in a few simple steps. Once integrated, the system will automatically handle communications, boosting engagement, improving user experience, and enhancing your website’s conversion potential.

Step 1: (Install WP form Webhook Add-on) 

Along with the WP form plugin (You must have the pro version of the WP form), we will need a plugin called Webhooks Addon.

  1. From the WordPress dashboard, select WPForms and then select addon. A plugin page with all the Addons of the WPForm will be available.
  2. Install the Webhooks Addon and activate it. 
     

    2-14.png
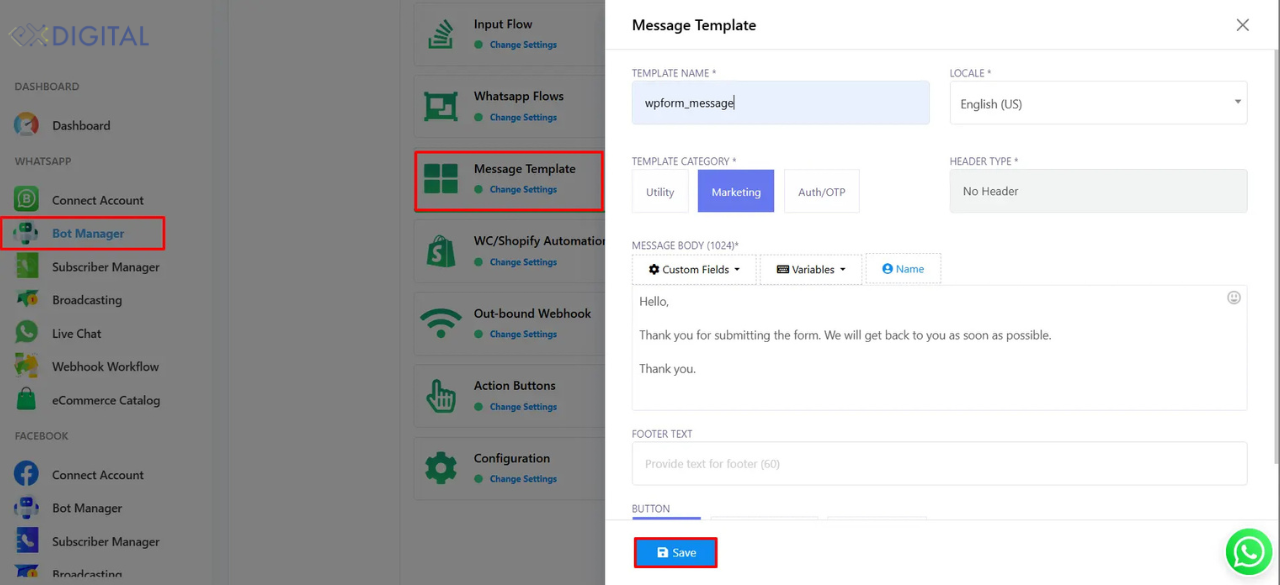
  3. Step 2: (Create a Message Template) 

  4. Meta allows only an Approved Message Template to initiate business message to WhatsApp. So, we must create a Message Template and it must be approved by Meta.

  5. From the Exldigital dashboard, go to WhatsApp Bot Manager and select Message Template.
  6. Click on the Create button, and select General Template.
  7. Provide a name for the template, select the locale and the category and then header type.
  8. Then write the message body.
  9. We can also add buttons like Call to Action and Quick Reply.
  10. Save it and close the window.
  11. Click on the Sync Template button to synchronize it. When it’s approved by Meta, it will be available to use.

    3-12.png
  12. Step 3: (Create Webhook Workflow campaign) 

  13. Then, we need to create a webhook workflow.

  14. Go to Webhook Workflow from the Exldigital’s dashboard and click on the Create
  15. Give a name to the workflow, select the WhatsApp account and the Message template to use for this campaign.
  16. Click on the Create Workflow It will provide a Webhook Callback URL, copy the URL. We would need this URL in the WPform.
  17. Don’t close the window yet. The campaign is not created yet. 
     

    4-10.png
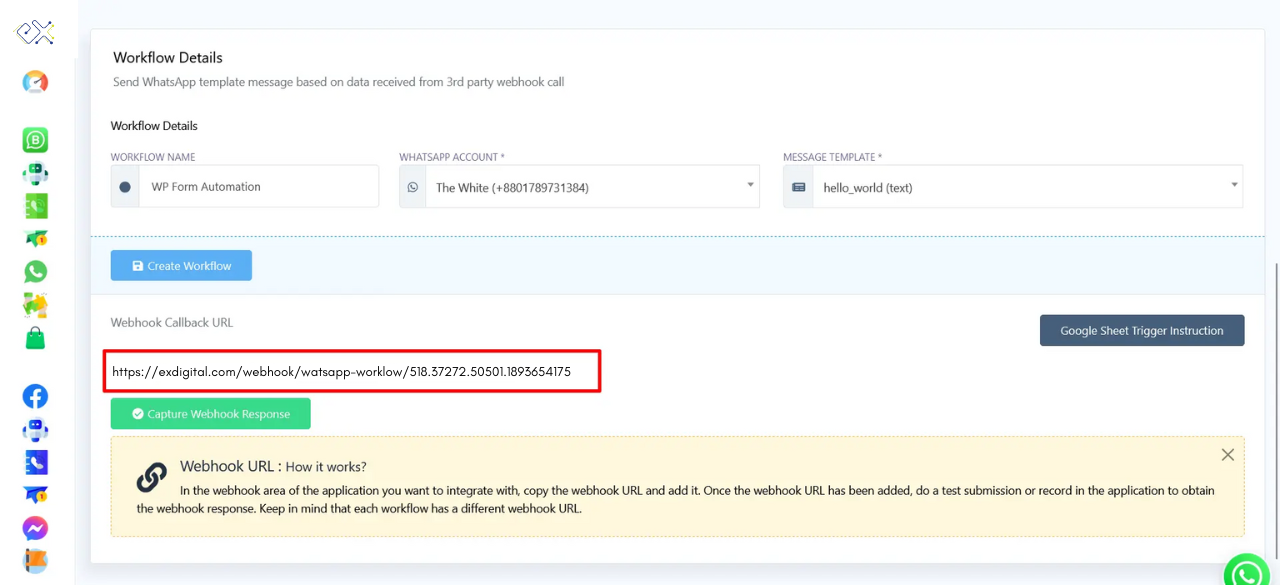
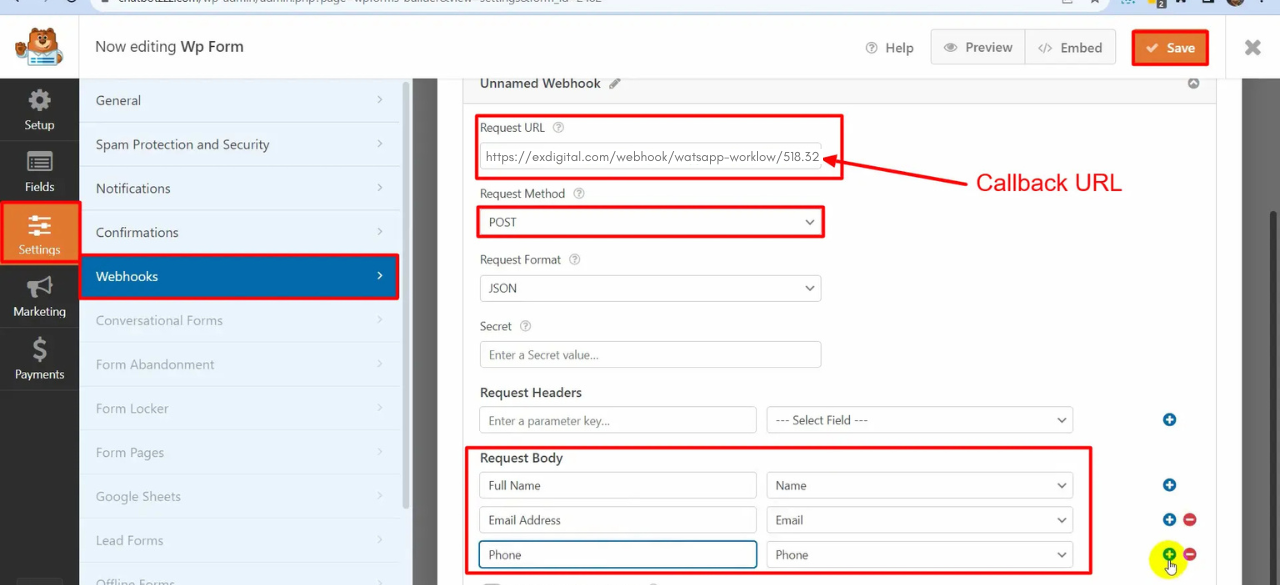
  18. Step 4: (Create a WP form and add the Callback URL) 

  19. In this step we are going to create a new WP form with a phone number field and add the copied URL in the webhook settings from the previous step.

  20. From the WordPress dashboard, go to WP Form and then select Add New. Name the form and select a template for the form and add a phone number field in the form.
  21. Now, go to WP form settings, select the webhook, and enable the Webhooks.
  22. In the Requested URL field, paste the copied callback URL.
  23. On Request Method, select POST.
  24. From the Request Body, select the name field and enter a parameter key (for reference). We will add more request body by clicking on the “+” button.
  25. We will add 3 more request bodies for email, phone number, and the message body.
  26. Finally, save the form. 
     

    5-8.png
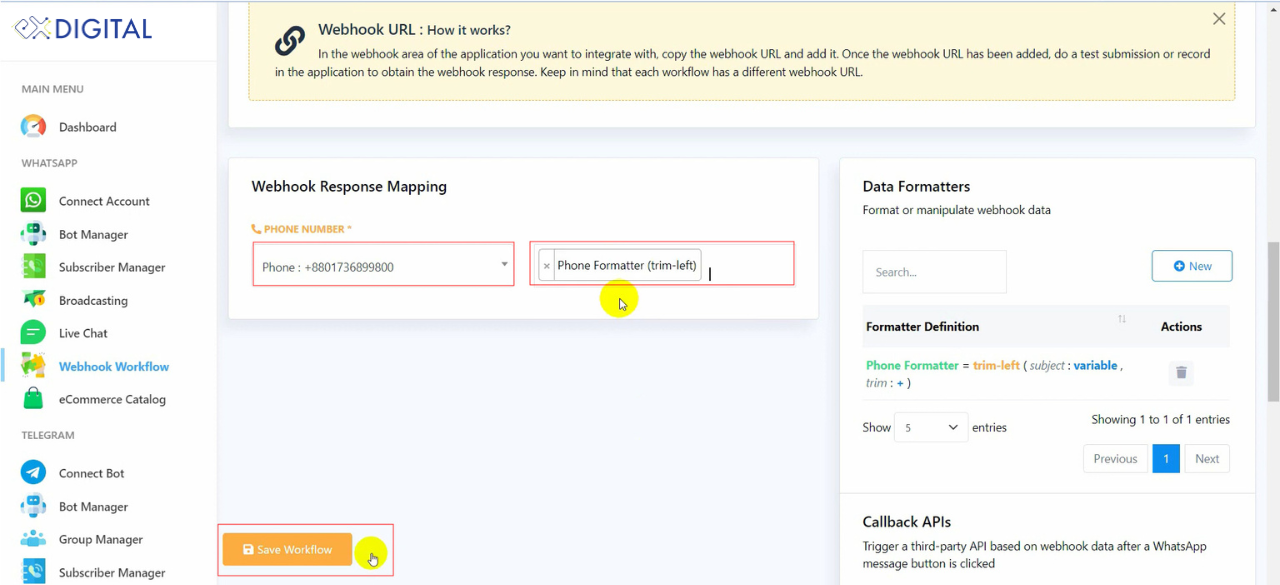
  27. Step 5: (Send sample data and map the workflow) 

  28. Now, we have to fill the form once to send sample data to Exldigital’s webhook and map the campaign accordingly.

  29. Go to the WP form and fill out the form.
  30. Then, go back to Exldigital’s webhook where we left and click on the Capture Webhook Response Upon clicking, the webhook will capture the sample data that we just entered on the form.
  31. Now, from the Webhook response mapping; click on the phone number field and select the phone number from the raw data.
  32. Likewise, there will be more field to map if we have variables in the Message Template. Every variable should be mapped with the sample data.
  33. Then save the campaign. 
     

    6-7.png
  34. Integrating automated WhatsApp messaging with WP Forms using exldigital is a powerful way to improve customer communication, streamline workflows, and enhance lead generation. By following the right setup, you can create a system that automatically sends personalized WhatsApp messages when a user submits a form.
  35. This automation not only saves time but also improves the customer experience, showing visitors you value their inquiries. Start using WP Forms WhatsApp integration with exldigital today to boost user engagement, strengthen customer relationships, and increase conversion rates with minimal effort.
Share: