Office Address
123/A, Miranda City Likaoli
Prikano, Dope
Phone Number
+0989 7876 9865 9
+(090) 8765 86543 85
123/A, Miranda City Likaoli
Prikano, Dope
+0989 7876 9865 9
+(090) 8765 86543 85


 by exldigital
Sequence Messages are automated sets of messages sent to subscribers at specific intervals. This tool is essential for lead nurturing, customer engagement, and running marketing or promotional campaigns through a Messenger chatbot.
exldigital offers the Sequence Message feature for its Facebook Chatbot platform. It runs scheduled message campaigns in Messenger at predetermined intervals set by the admin.
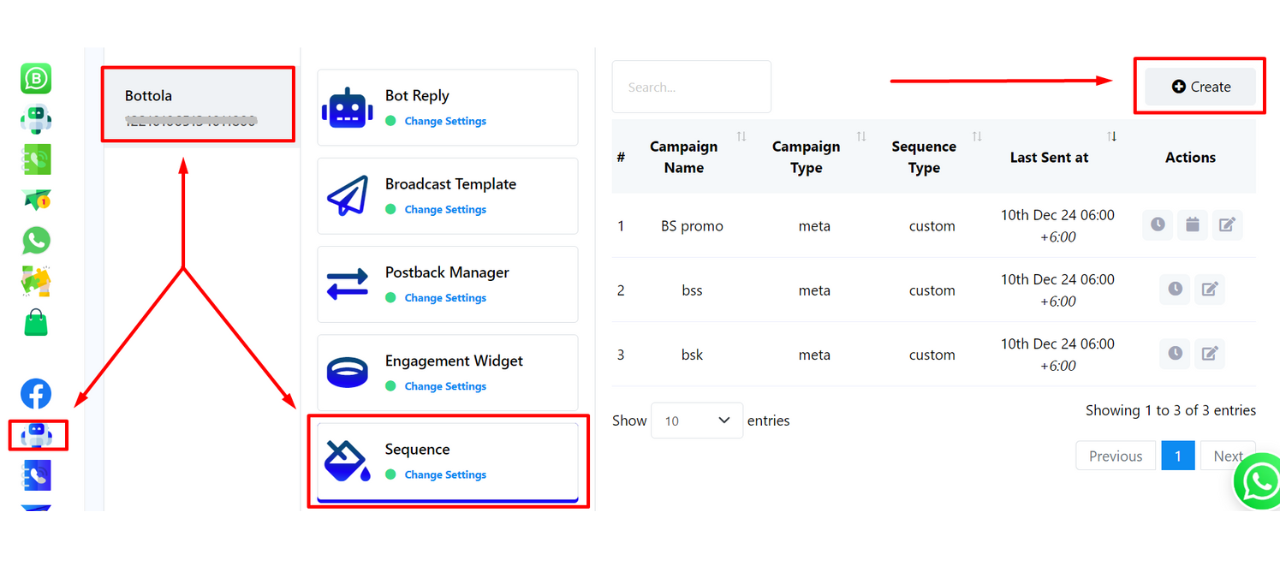
First, navigate to the Facebook Section from the exldigital dashboard. Select an account for which you would like to create the sequence. For this part, we have selected ‘Bottola’ as you can see. Click on the Sequence section and here you can see all your campaign names. Click on create which will take you to the Flow Builder-section.
Double click on the Start Bot Flow and write one or more trigger words. Here, we assign the trigger word promo.
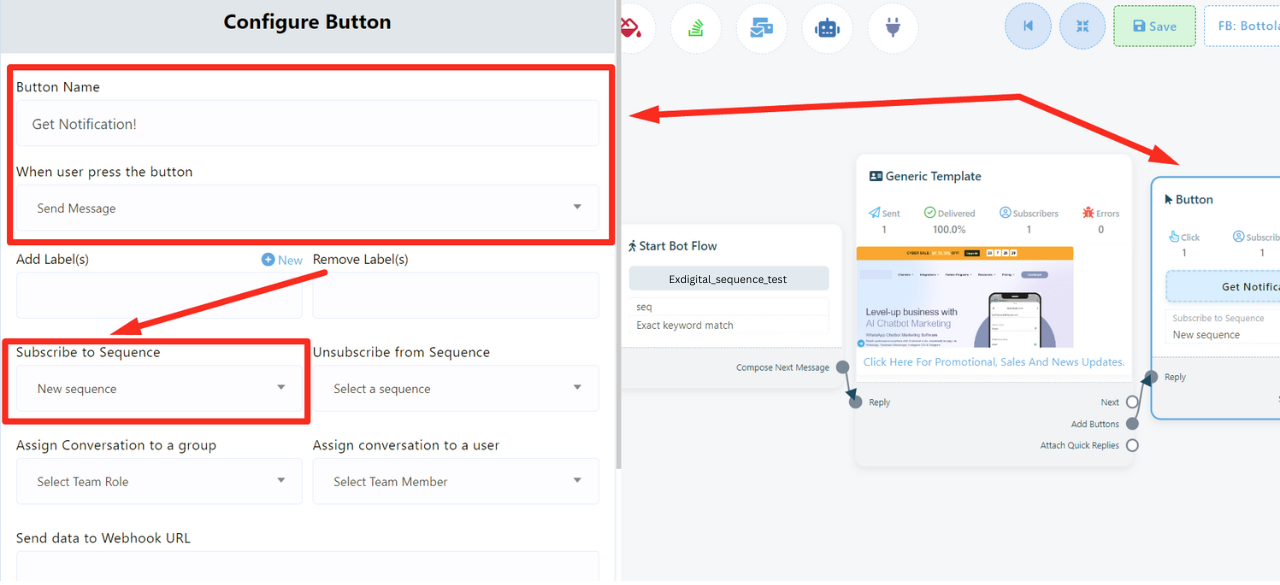
Give the bot the title exldigital_sequence_test and save it. Click Compose Next Message and choose Generic Template.
Double click to open the template, upload an image, and add an SEO-friendly title that prompts the customer (use relevant SEO keywords like digital marketing offers, SEO services promo, best digital deals). Click the adjacent button, name it Get Notification!, and set Send Message on button press.Then click Subscribe to Sequence, choose New Sequence from the dropdown, and save.
Step Three:
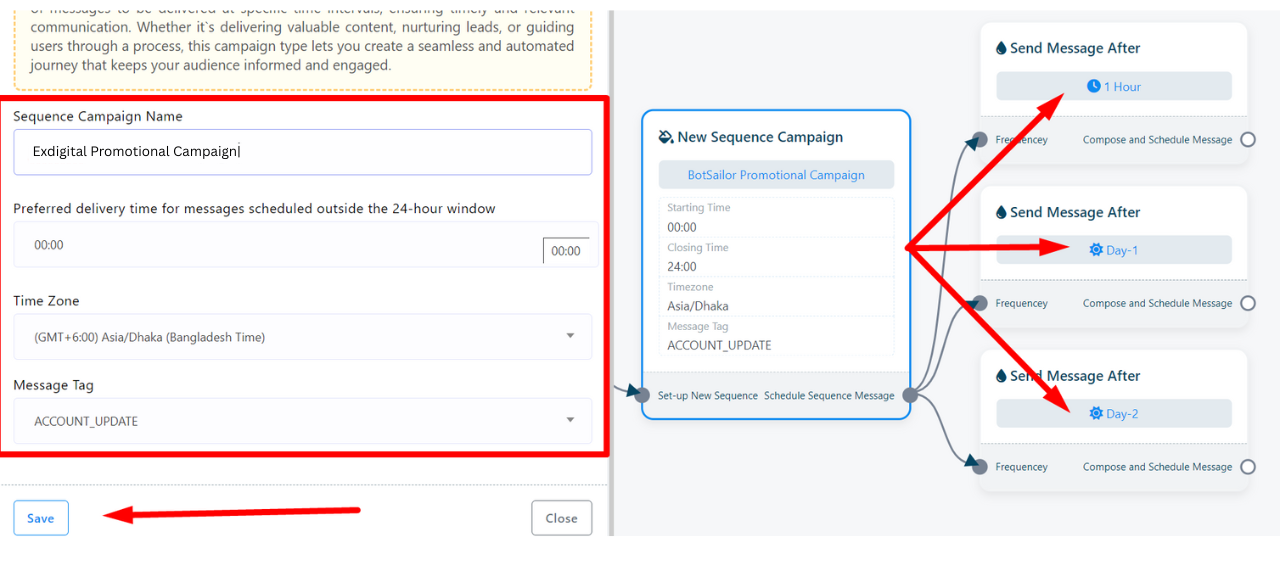
Saving the button will initiate a New Message Sequence box followed by three time setting boxes. Type the sequence campaign name as BotSailor Promotional Campaign. Select 00:00 as preferred delivery time. Select the Time Zone. For this one we have selected (GMT+6:00) Asia, Dhaka and ACCOUNT_UPDATE as Message Tag. We will set the first time frequency after 1 Hour (Selecting within 24-hour time window), the second one is Day-1 (Selecting outside 24-hour time window), which is after 24 hours and the last one will be Day-2 (Selecting outside 24-hour time window), that is after 48 hours.
Step Four:
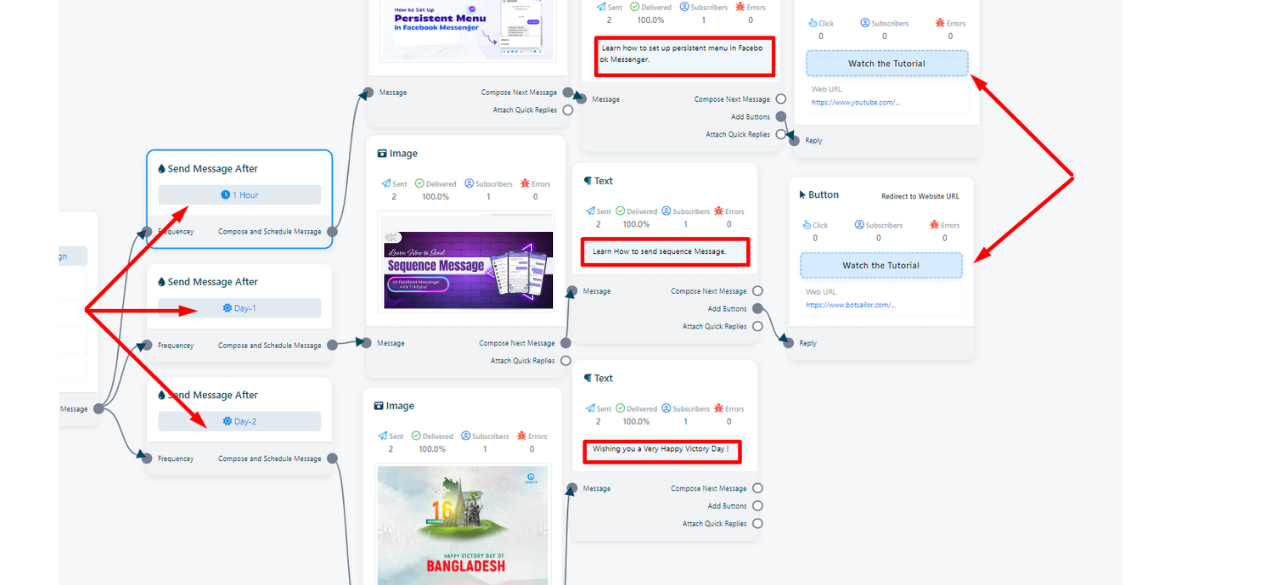
Now, let’s configure the messages we will send while maintaining the time intervals. Firstly, take up an image box and upload an image. Next, take a text box. Lastly, add a button with the text box. The first message (after 1 hour) will be about “How to Set up Persistent Menu on Facebook Messenger.” We will send an image, followed by a text box and a button with the URL of the tutorial video. After that, configure the second button (sequence message after 1 day) by adding the same elements. Just here, we have uploaded an image and text regarding “Learn How to send Sequence Messages on Facebook Messenger” and a button with the URL of the dedicated tutorial video. Lastly, we have added an image box and a text box only wishing “Happy Victory day!” with a thumbnail. At last, click on Save to save the sequence.
Step Five:
Now, we will move to the customer’s end and see how the sequence works. Since, we will get three consecutive messages this segment is divided into three stages.
Stage One:
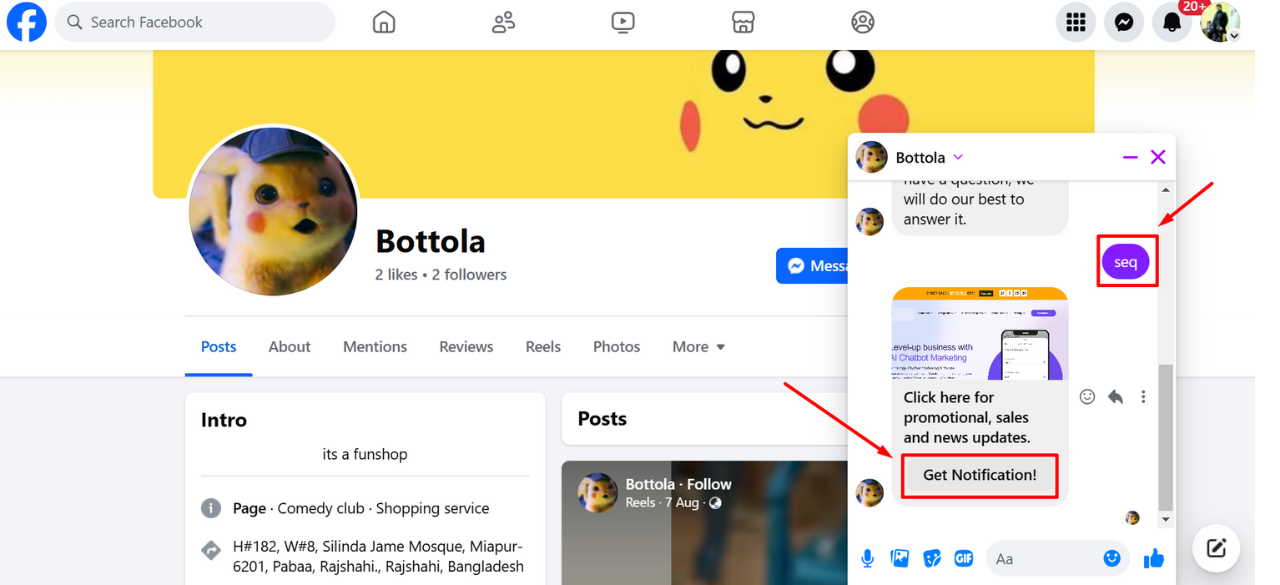
After the Getting Started message we have typed the trigger word where the initial message has been triggered. Click on the Get Notification button. We should be getting the first message after one hour. Let’s see what happens after one hour.

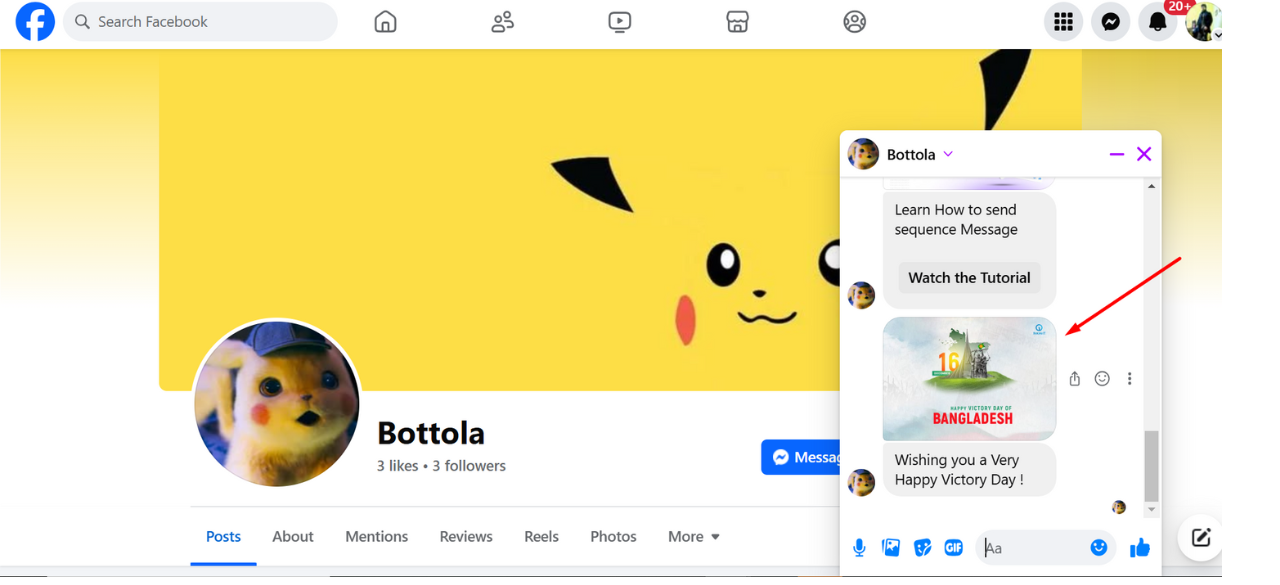
We got the first message about “Learn how to set up a persistent menu in Facebook Messenger” after one hour of subscribing. Now, click on Watch the Tutorial button.
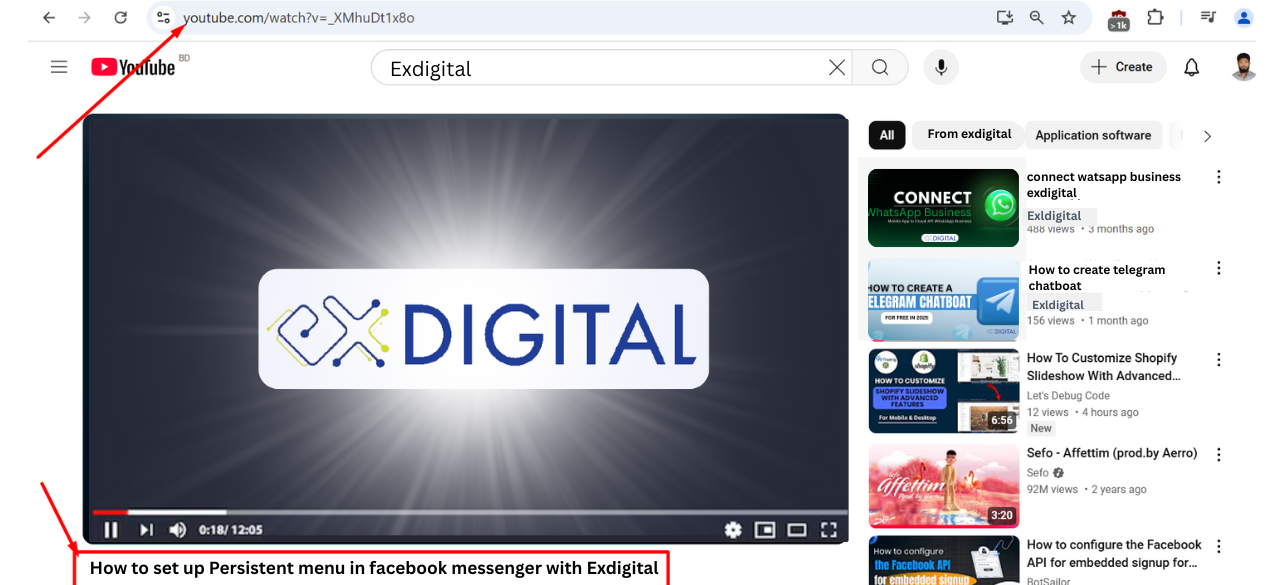
It will take us to the URL for the tutorial video. Thus, this button works. Let’s come tomorrow for the next message.
Stage Two:
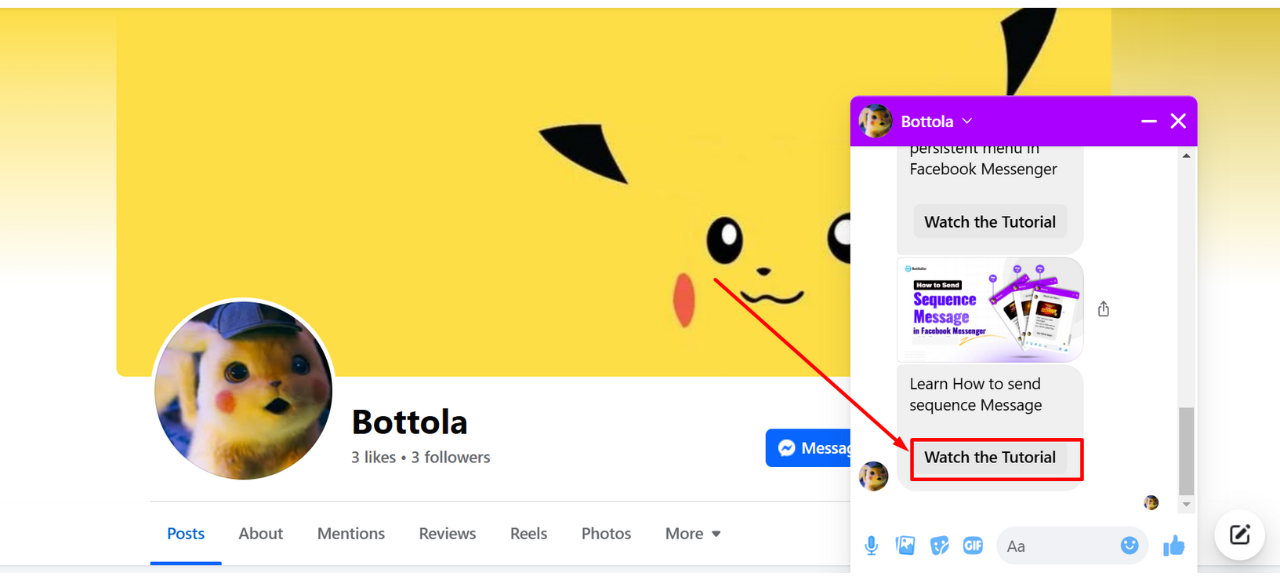
Here, we have got the second message that says “Learn How to Send a Sequence Messages”. Click on Watch the Tutorial button which will lead us to the tutorial video.
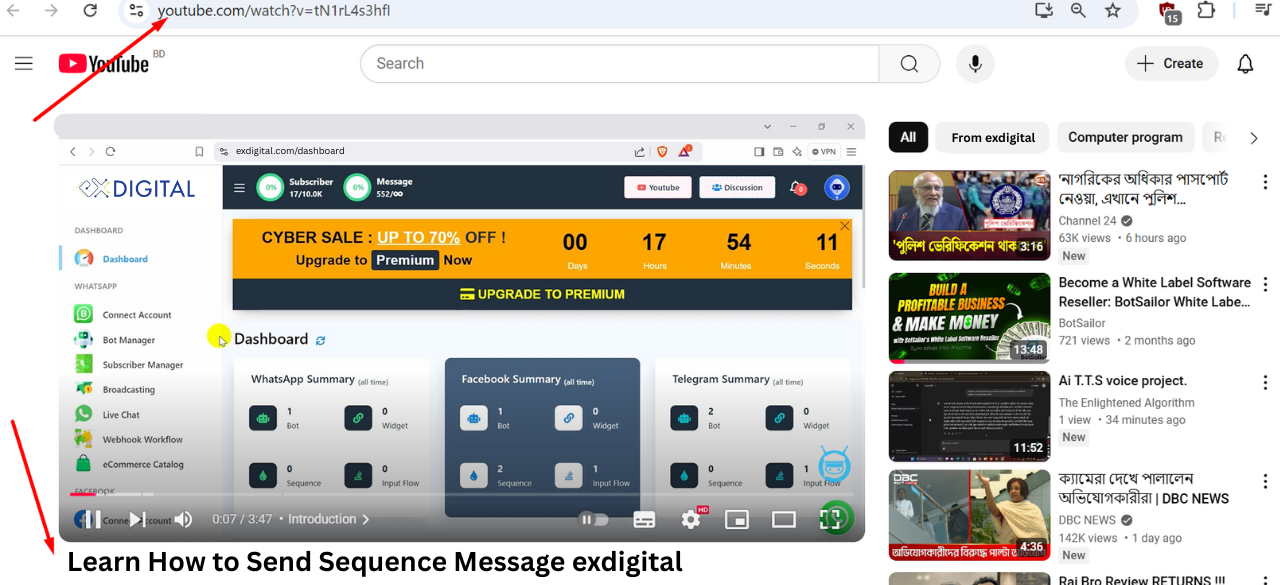
Here, you can see it redirected us to the tutorial video link. Now, Let’s wait for the very last message of our three sequence messages and come after one more day.
Stage Three: